• Skip to primary navigation
  • Skip to main content
  • Skip to primary sidebar
  • Home
  • About
  • Contact
  • Privacy + Terms
  • Affiliates

The Chaos and the Clutter

  • Facebook
  • Twitter
  • Pinterest
  • Google Plus
  • RSS
  • Email
  • School at Home
  • Sensory
    • Sensory Processing Disorder
    • Awesome Sensory Play Activities
      • Sensory Bins
      • Sensory Bottles
      • Sensory Bags
  • Family Games
    • Minute to Win It Games
  • Special Needs Parenting
    • Childhood Anxiety
    • Reactive Attachment Disorder
    • Sensory Processing Disorder
  • Store
  • Course Login

Sensory

Summer Sensory Bins

By Sharla Kostelyk

Ahhh, summer…that wonderful time of year when the weather is nice and life seems simpler. Unfortunately, it’s also the time of year when kids seem even more restless and even though some things about parenting may be easier, the sensory needs of your child don’t automatically disappear.

In fact, the sensory needs of some kids become more noticeable in the summer as they adjust to the changes in routine.
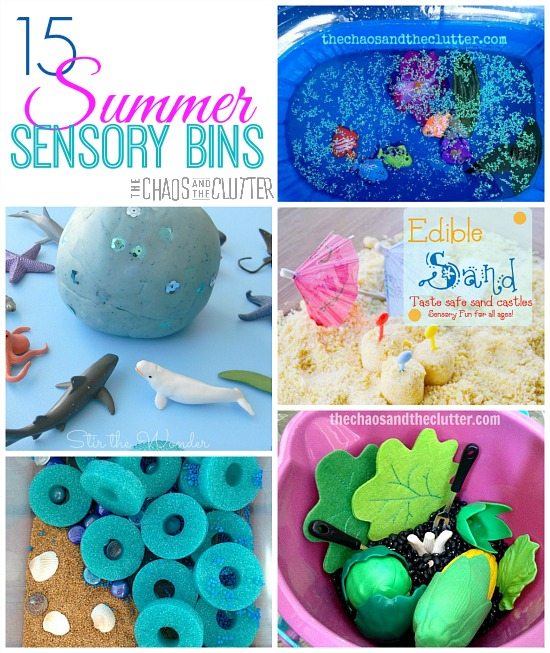
15 Summer Sensory BinsTo combat this challenge with my kids, many of whom have Sensory Processing Disorder (SPD), I use sensory stations. Sensory stations are even easier to set up in the summer because so many of them can be set up outside with little to no preparation. One sensory station that we always keep year-round is a sensory bin. I make a new sensory bin every week or two.
Sensory Station Ideas for the home or classroomEven though my kids are getting older, they have not outgrown sensory bins. They still play in them and after spending time with one, they are calmer and more able to focus.

These ideas will help inspire you to create your own sensory bin for your kids this summer:

Summer Sensory Bin here at The Chaos and The Clutter

Frog Life Cycle Sensory Bin from Teaching Mama

Starfish and Sand Dollar Shaving Cream Tray from The House of Burke

Water Sensory Tray here at The Chaos and The Clutter

Edible Sand Sensory Activity from A Little Pinch of Perfect

Fizzy Ocean Sensory Bin from Wildflower Ramblings

Seaside Sensory Bin here at The Chaos and The Clutter

Beach Themed Water Sensory Table for Toddlers from Golden Reflections Blog
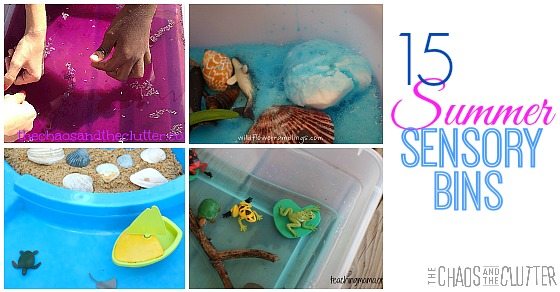
Summer Sensory Bin IdeasSparkling Ocean Playdough from Stir the Wonder

Calming Lavender Sensory Bin here at The Chaos and The Clutter

Sea Turtle Sensory Bin from Teaching Mama

Watermelon Sensory Play from Little Bins for Little Hands

Garden Sensory Pail here at The Chaos and The Clutter

Ocean Sensory Bin from Happy Hooligans

Gardening Sensory Bin from Mama Papa Bubba

For hundreds of other sensory bin ideas, you can also follow my Sensory Bins board on Pinterest.

Follow Sharla Kostelyk’s board Sensory Bins on Pinterest.

If you are looking for information on making sensory bins, you may be interested in my book. The Ultimate Guide to Sensory Bins
Join our free 5 part email series Sensory Solutions and Activities and get our Sensory System Behaviours Easy Reference Cards.
Filed Under: Crafts and Activities, Sensory, Sensory Bins

Ghost Hands Campfire Fun

By Sharla Kostelyk

I’m not sure if moms and dads out there are going to hate me or thank me for introducing them to ghost hands! I’m not sure if I should thank my friend Christie for introducing it to my kids but I’m paying it forward by introducing it to the world!

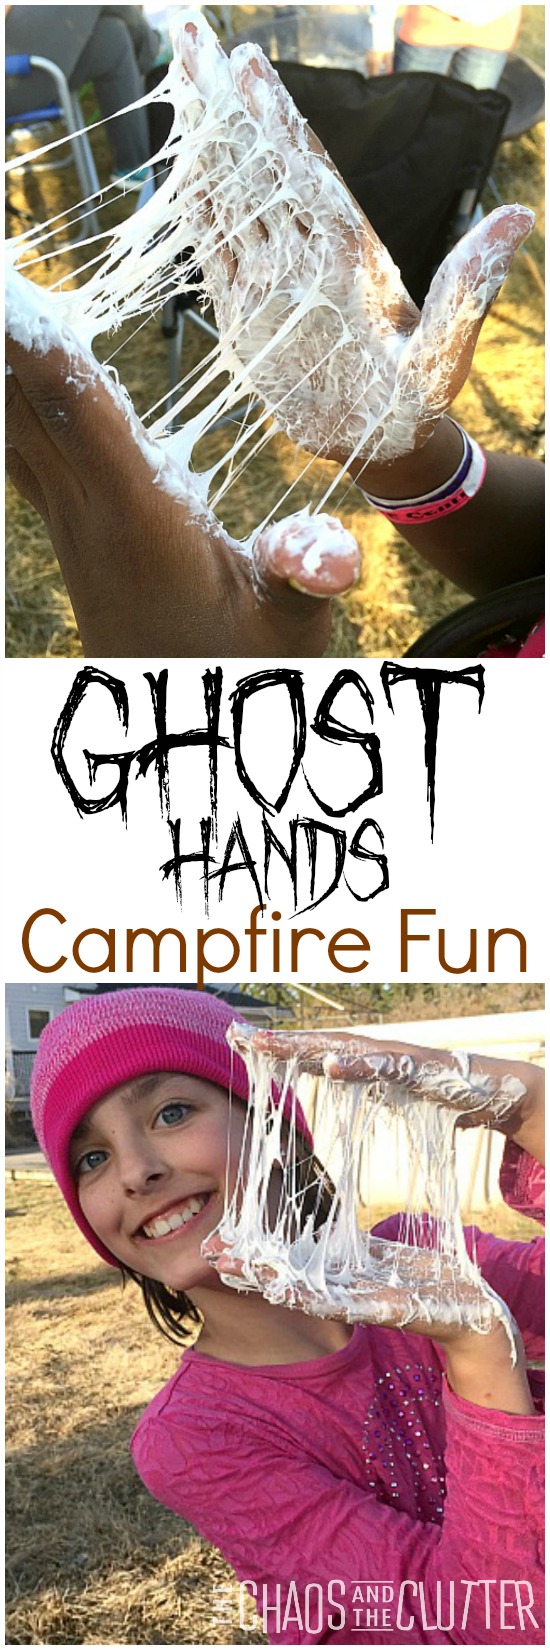
Ghost Hands - the most fun you can have around a campfire!I warn you now. It’s messy. Sticky and messy. And yuck. But fun. So much fun!
We were over at our friends’ (and neighbours) house. It was the first warm Sunday afternoon of the Spring and we were enjoying a visit by the campfire after an outdoor spaghetti dinner. The sounds of approaching summer could be heard over the sound of the dirt bikes and quads the kids took turns riding. Later, the kids made s’mores while the adults visited.

Christie asked my kids if they had ever heard of “ghost hands”. They had not and she kindly decided to teach them. I wasn’t too thrilled with that at first since it’s so messy but it turned into the most fun our family has had in a long while.

The kids weren’t the only ones who were laughing! If you can get past the messy factor, you’re going to love this one! I know there will never be another campfire where my kids don’t ask to do ghost hands!

ghost hands…the most fun that can be had around a campfire!Ghost hands are about as cheap and easy as family entertainment gets!
You only need one item, marshmallows. You could of course do it anywhere but I would HIGHLY recommend you only do this outside!

This doesn’t have to be a campfire activity, but it does make sense to have it be because then everyone is already outside, having fun, and there are often marshmallows on hand to roast over the fire or to make s’mores with.

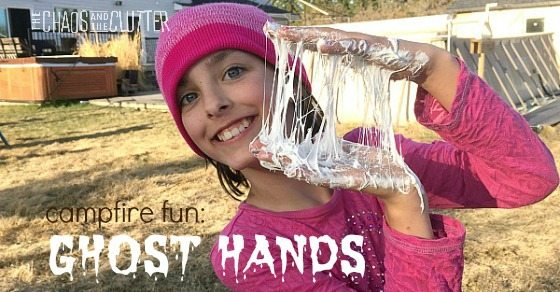
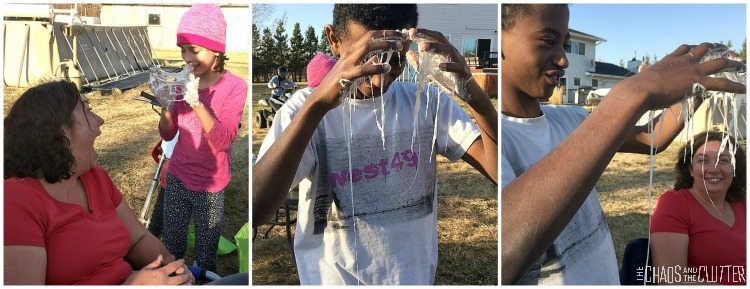
The ghost hands process is very straightforward. Take one large marshmallow and start to work it between your hands. Work it until it is squishy and just keep smooshing it. It will eventually get to a point where when you pull your hands apart, strings of ooey-gooey marshmallow mush will connect the hands. That’s when you know you have achieved Ghost Hands!

Now it’s up to you what you do with your ghost hands. You can play with the mess you’ve created and enjoy the sensory experience or you can chase your parents, siblings and friends around the yard, pretending that you are going to touch their hair with your ghost hands if you catch them!

You can put your hands down on the grass and the grass will stick to them, creating a sea creature hands type of effect. You can try to catch mosquitos in the white web you’ve created. There’s no end to the fun that can be had with just that one marshmallow! If you want to, you can even lick your hands (eww)!

Ghost Hands FunThese pictures were taken before the kids got the idea to chase the adults around the yard, gooey hands outstretched, reaching for our hair! You can see Christie’s delight though in having taught my kids something that will surely be creating messes for me for years to come!
Note to parents:

This washes off easily. Just bring out a basin of warm, soapy water and your kids will lose their ghost hands and you won’t have to worry about them making sticky handprints in the house!

I wasn’t sure how this one would go over with some of our SPD (sensory processing disorder) kids but they loved it and there were no issues.

Join our free 5 part email series Sensory Solutions and Activities and get our Sensory System Behaviours Easy Reference Cards.
Minute to Win It Family Fun Night

Trampoline Games and Other Fun Trampoline Ideas

Waiting Rooms: a Parent’s Survival Guide

Filed Under: Crafts and Activities, Sensory Tagged With: sensory play

Citrus Sensory Bin

Citrus Sensory Bin

By Sharla Kostelyk

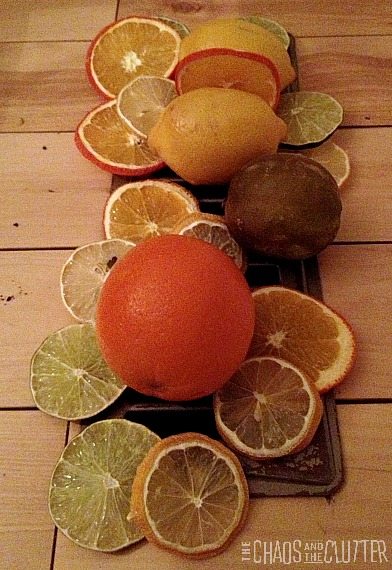
I first got the idea for making this sensory bin when my neighbour was telling me that you can dry out limes. I thought it would be neat to combine some elements of real food with other items in a sensory bin. I liked the idea of keeping some of the natural scents and textures.

Citrus Sensory Bin

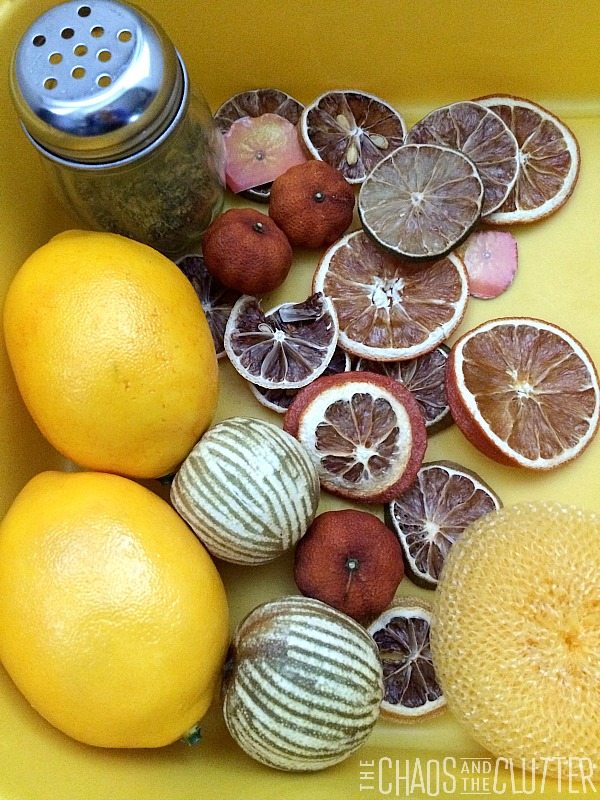
This took me on a bit of an experimental journey into drying citrus! I had some limes that I had taken some of the zest off for a recipe (that’s why there are stripes on the limes in the picture!) and I set them on top of the registers so that when the heat came on, they would dry out.

Drying the limes worked really well so I decided to try the same process on oranges and lemons. The larger fruit didn’t fare as well.

I wasn’t deterred. I then tried slicing oranges and lemons and limes and drying the slices in the same way I had dried the limes. I threw a few more of the whole fruit on there as well to see if I might have better luck the second time around. The larger lemons and orange didn’t work out but the citrus slices did.

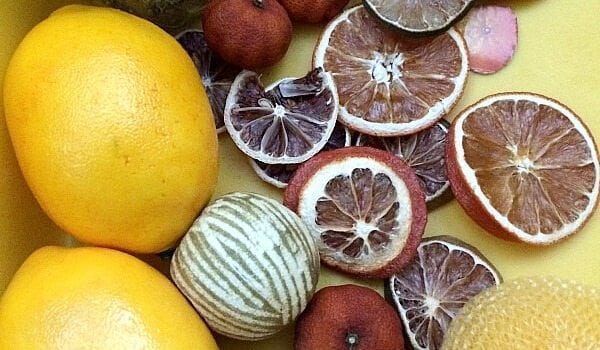
drying citrusFor the sensory bin, I used dried lemon, orange and lime slices, the dried limes, some dried mini mandarin oranges, 2 plastic lemons, some oranges I had cut out from the cardboard box the mandarins came in, and a yellow scrubber. I also added a shaker of lemon pepper to put another element of citrus scent in the bin.
It was a very different sensory bin than what we usually make so it was a nice change and the kids thought it was neat that it used real fruit.

If you are looking for information on making sensory bins, you may be interested in my book. The Ultimate Guide to Sensory Bins

Join our free 5 part email series Sensory Solutions and Activities and get our Sensory System Behaviours Easy Reference Cards.

Filed Under: Sensory, Sensory Bins Tagged With: sensory bin, sensory play

Waiting Rooms: a Parent’s Survival Guide

By Sharla Kostelyk

Over the years, I have put in my time in waiting rooms. From the usual doctor’s and dentist’s offices that most parents sit in to all the specialist appointments that having five kids with special needs will bring, I have sat in waiting rooms for more combined hours than I can even count. Be sure to read my top ten tips for juggling all those appointments and saving time.

Waiting Rooms: a Parent's Survival Guide

Through all those hours, I have learned a few things about ways to pass the time and make the most of the waiting.

Come prepared.

Many factors determine how long your wait will be and the majority of those are out of your control so it is best to over-prepare rather than be caught needing something you don’t have. An example would be an appointment that you expect to be over well before snack time or lunch time or nap time that runs late. Bring anything you might need: blankets, water, snacks, activities, phone chargers, pens and paper, and any medication for the day just in case.

I’ve even had what I thought would just be a simple appointment turn into us being sent to the hospital and staying there for almost a week, so it really is best to be prepared.

Ideas of what to bring:

  • resealable bags (for emergencies like a child throwing up)
  • kleenex
  • wipes
  • medication (both prescription and things like allergy medicine and pain relievers)
  • comfort items such as a special stuffy or blanket
  • phone charger
  • snacks
  • water bottles
  • soother (pacifier)
  • change of clothes for your child (or even for you)

Busy bags and activities.

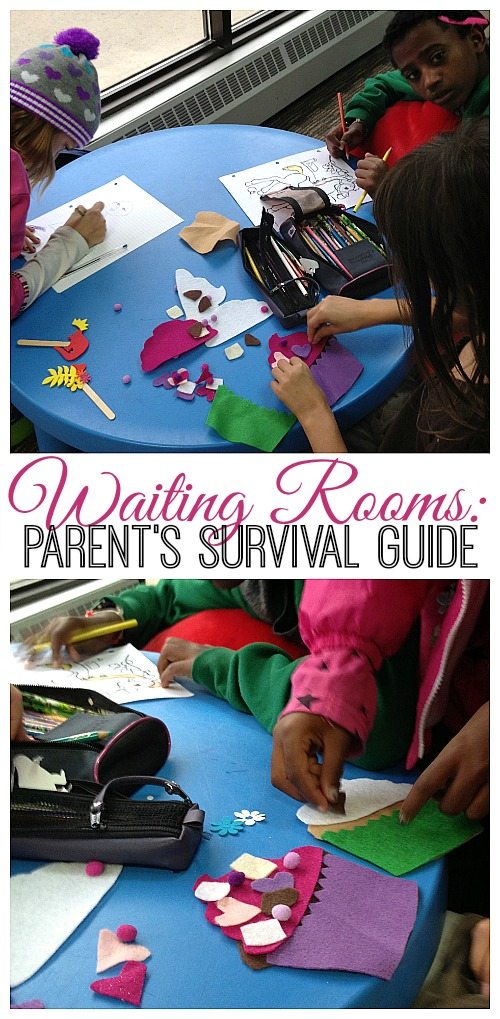
I bring a variety of busy bags and activities with me. I also keep a small Etch-a-Sketch in my purse at all times.

Oftentimes, a waiting room will be equipped with toys and books, especially if it is a practice that specializes in children, but I’m a bit of a germaphobe, particularly when it comes to things in a doctor’s office. I would rather my kids read a book from home or play with toys we brought with us than use what sick kids have been coughing all over.

Surviving the Waiting Room

Ideas of what to bring:

  • busy bags (click those words to see our busy bags you can easily make yourself)
  • pens, paper
  • etch-a-sketch or magnadoodle
  • magic ink books
  • coloring books and crayons or markers
  • maze books
  • crosswords
  • clipboards with sheets you have printed off
  • homework/schoolwork
  • playdough
  • books
  • flash cards
  • string to play cat’s cradle
  • Chinese skipping rope

Don’t forget the activities that don’t require any tools like playing I-Spy, Round and Round the Garden, Head and Shoulders, or even doing the Hokey-Pokey!

Sensory needs.

Most of my kids have sensory processing disorder, so I keep fidgets and sensory balls (click here to find out how to make them yourself for pennies each) in my purse. I also keep an arsenal of ideas for meeting their sensory needs in my head and even in a crowded waiting room, I pull them out.

It is so much easier to be on top of their sensory needs than to have them turn into behaviour issues. Nothing makes a waiting room more uncomfortable than when one of your kids is having a tantrum! Read how to avoid sensory meltdowns here.

Notebook and pen.

This one is actually for you, not for your kids. I have found that sometimes particularly when it is at an appointment where one of my kids is receiving a new diagnosis, my brain does not process the information well. I sit there and nod but nothing is actually being remembered. I have learnt over the years that it is crucial that I bring a notebook and write things down at important appointments.

Be productive.

A waiting room doesn’t have to be a place to waste time. You can bring cookbooks and plan out your meal plans and grocery list. You can bring your laptop and get caught up on some work. You can go through emails on your phone. You can even sort pictures.

You can have your child bring their schoolwork. Waiting rooms are a great place for you to work with them on skills such as reading, spelling and multiplication tables.

Waiting areas are also a good place to work on your relationship with your child. If you are there with just one of your kids, take advantage of the time you have alone together. Get to know them a bit more and catch up on what is happening in their life and how they are feeling.

Other potentially helpful information if you spend too much time in waiting rooms:

The More Calm in the Chaos Printable Planner for Moms includes forms for all kinds of things pertaining to appointments. It will make life easier, especially if you are parenting a child with special needs.

The Busy Mom's Guide to Juggling Multiple AppointmentsTop Ten Tips for Juggling Multiple Appointments

Join me for a free 5 part email series, Little Hearts, Big Worries offering resources and hope for parents.

Filed Under: Parenting in the Chaos, Sensory, Special Needs Parenting

History Sensory Bin

By Sharla Kostelyk

I find it easiest to create sensory bins that have some type of theme to them. If there is something that we are studying in homeschooling, a sensory bin along that theme can further reinforce what the kids are learning as well as providing an opportunity for sensory play.

Last week, the kids watched the classic musical “Annie Get Your Gun“. They adored it and are still singing “no, you can’t get a man with a gu-un”! Granola Girl was even singing it through the aisles in the grocery store the other day!

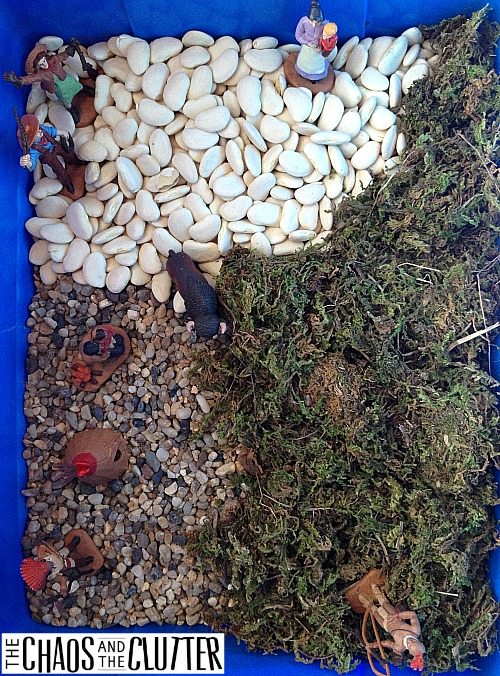
Since they were already so interested and asking lots of questions, I decided to expand their learning and teach them about the history of Annie Oakley, the woman the movie is based on and about that time in history. I happened to have a Wild West TOOB which had an Annie Oakley figurine in it (I hadn’t even noticed that when I bought it!) so I used that to create a sensory bin that would allow the kids to play and expand on the story they had watched in the movie.

History Sensory BinFor the base of the bin, I used dry white beans in one section, aquarium rocks that we had left over from a science experiment we had done the week before in another section and I finished it off with an area of moss. Then I added the Wild West TOOB figures and let the kids play.
I know that my sensory bin may not be completely historically accurate, but the point of it is to get the kids more interested in history and its characters by letting them explore. They loved that there was an Annie Oakley figure and had such fun reenacting scenes from the movie.

You can create a history sensory bin to go with any period in history (think Ancient Greece or Ancient Egypt) or that is centred on a specific historical figure (think inventors, artists, politicians or heroes).

For hundreds of other sensory bin ideas, you can also follow my Sensory Bins board on Pinterest.

Follow Sharla Kostelyk’s board Sensory Bins on Pinterest.

If you are looking for information on making sensory bins, you may be interested in my book. The Ultimate Guide to Sensory Bins

Join our free 5 part email series Sensory Solutions and Activities and get our Sensory System Behaviours Easy Reference Cards.

Filed Under: Homeschooling, Sensory, Sensory Bins Tagged With: sensory bin, sensory play

Winter Wonderland Sensory Bin

Winter Wonderland Sensory Bin

By Sharla Kostelyk

For the start of our holiday season this year, I thought I would create a sensory bin with a winter wonderland theme. It’s a stark difference from our usual Christmas sensory bin with bright holiday colours, but the kids were delighted by it.

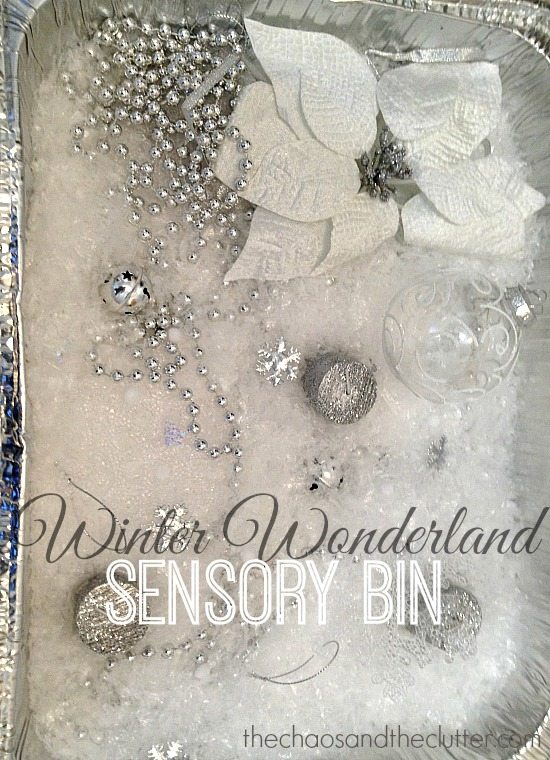
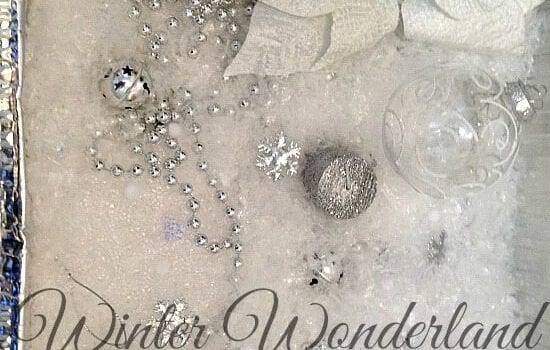
Winter Wonderland Sensory BinI used a large foil roasting pan as the bin because I thought the silver looked best with what I was planning. For the bin’s base, I used shredded snow. I bought a bag of it from the dollar store and when I examined it once I got home, what it looked like was shredded bubble wrap, so it would be easy enough to make your own.
I added silver candles, silver puffy snowflakes, large clear plastic snowflakes, silver beads, jingle bells, silver ribbon, small white pompoms, a clear plastic ornament with white and silver detailing, and a white poinsettia clip.

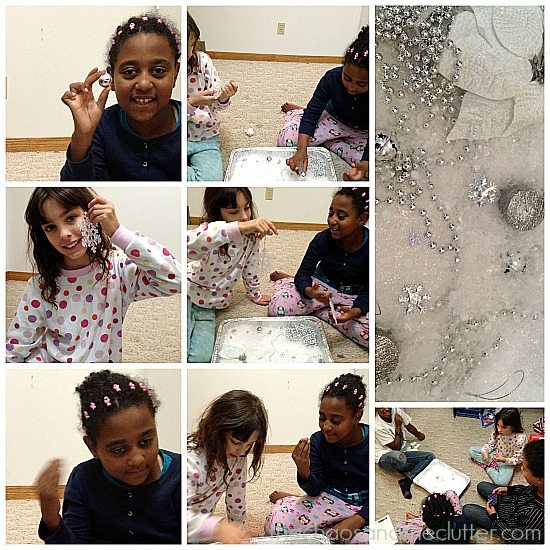
Playing with Winter Wonderland Sensory BinMy kids have been enjoying the bin.Dancing Queen gravitated towards exploring the sounds by listening to the jingle bells and the crinkle of the beads. Granola Girl was initially after a more tactile experience and found the texture of the clear snowflakes very appealing. She kept touching them to her face as well as running her fingers over the ridges.

The boys were most interested in the feel of the fake snow and they may have had a small “snowball” fight with the white pompoms! Such funny creatures boys are! They can even find a way to make a sensory bin an action packed adventure!

If you are looking for more sensory ideas or information, you may be interested in my book and by following my Sensory Bins board on Pinterest.

The Ultimate Guide to Sensory Bins

Join our free 5 part email series Sensory Solutions and Activities and get our Sensory System Behaviours Easy Reference Cards.

Winter Sensory Tray

Gluten Free Candy Cane Playdough

Winter Sensory Bin

Filed Under: Crafts and Activities, Sensory, Sensory Bins Tagged With: sensory bin, sensory play

  • « Go to Previous Page
  • Page 1
  • Interim pages omitted …
  • Page 38
  • Page 39
  • Page 40
  • Page 41
  • Page 42
  • Interim pages omitted …
  • Page 50
  • Go to Next Page »

Primary Sidebar

Categories

We are a participant in the Amazon Services LLC Associates Program, an affiliate advertising program designed to provide a means for us to earn fees by linking to Amazon.com and affiliated sites.

Copyright © 2026 • The Chaos and the Clutter • Site Design by Jeni @ The Blog Maven

Return to top of page

Copyright © 2026 · Chaos and the Clutter 2.0 on Genesis Framework · WordPress · Log in